In this post we will walk through the process of installing a Slat Assembly on General Kinematics Vibratory Equipment.
TAKE NOTE: APPLYING SILICONE IS THE LAST STEP
Do not apply silicone to the slat assembly until all of the assembly hardware is torqued
This prevents the silicone from getting between the slats, shims, and steel.
Safety First:

Lockout: Lockout all related machines being worked on in accordance with your facilities Lockout-Tagout procedures.
Machines must be at Zero Mechanical State. (This normally means that the eccentric on the shaft will be hanging down.)
Review the Safety section on page 1 of all of General Kinematics Service Manuals.
Before You Begin:
- Please note that slats must be assembled according to the general arrangement drawing.

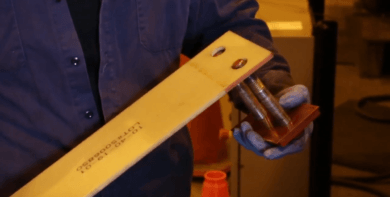
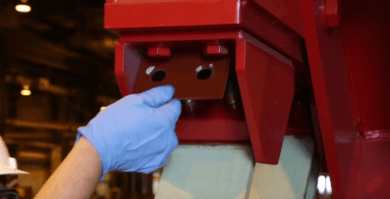
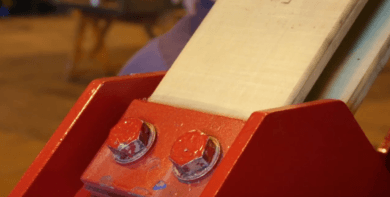
- Shims are installed to ensure that the slats do not contact any steal.
- As you can see in the above graphic, a shim is also placed between the slats to ensure that they don’t contact each other.
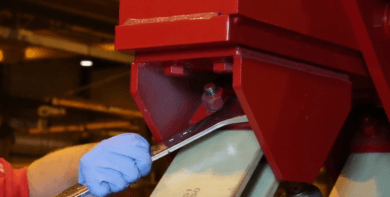
Once the Slat is in place:
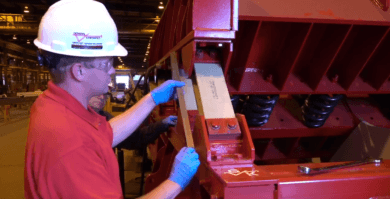
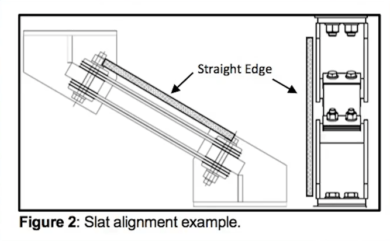
1.) Before fully tightening the hardware, each slat assembly must be properly oriented. Use a straight edge to ensure slat bracket alignment. The outermost bracket faces between the top and bottom brackets and must be parallel and in the same plane.
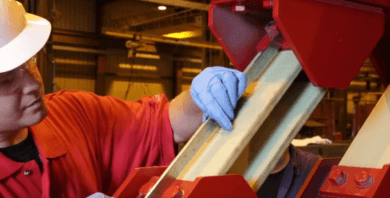
2.) Use a straight edge to ensure proper slat bar alignment the clamp bars on the top assembly must be parallel and on the same plane as the bottom clamp bars.
3.) Adjust the assembly until it is properly oriented.
4.) Tighten the bolts.
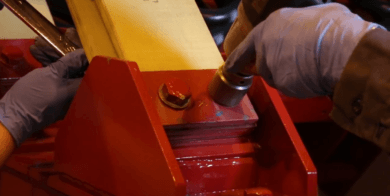
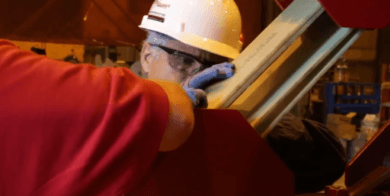
5.) Using a torque wrench, torque the fasteners according to the torque specified in the service manual for the size fastener being used.
6.) The fasteners must be re-torqued after 20-24 hours of operation.
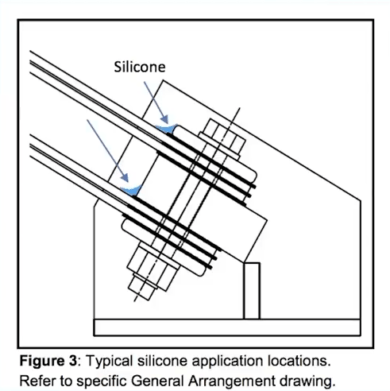
7.) Typically, silicone is applied in two locations on a slat assembly, as seen in Figure 3. Use the General Arrangement drawing for each specific machine.
Applying Silicone:
1.) First thoroughly clean the silicone application locations.
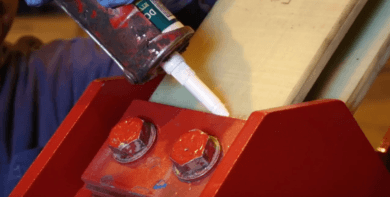
2.) Apply a quarter inch bead of silicone across the length of the steal to slat interface.
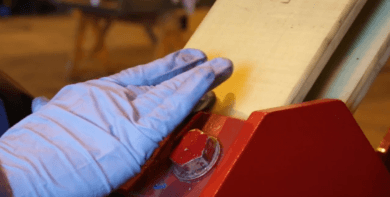
3.) Smooth the silicone bead to ensure complete coverage and adhesion.
4.) After smoothing the silicone should have a cross-section like the example shown above.
5.) Allow the silicone to dry before operating the unit.
If you’re unsure if the repairs or modifications you’re planning to do will affect your equipment, please contact us. We want to make sure that you take all appropriate steps to ensure your safety, success, and the long-term integrity of the machine.