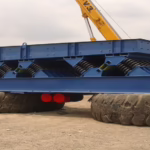
Damaged springs that are found during inspection or while the unit is in operation must be replaced immediately. This is in order to avoid overstressing the remaining coil springs as well as causing potential structural damage to the machine.
In an effort to promote proper maintenance procedures, below is a step-by-step guide to safely replacing pigtail coil springs.

Safety First:
- Lockout: Lockout all related machines being worked on in accordance with your facility’s Lockout-Tagout procedures.
- Machines must be at Zero Mechanical State. (this normally means that the eccentric on the shaft will be hanging down.)
- For more detailed information, review the Safety section on page 1 of all of General Kinematics Service Manuals.
Procedure for changing coil springs:
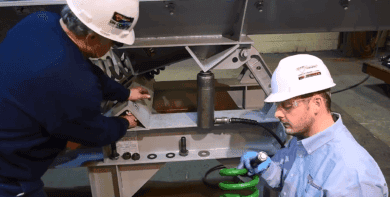
1.) Losen and remove the mounting fasteners for the coil spring.
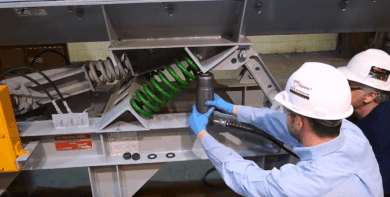
2.) Remove the spring by using a hydraulic jack or a porta power to lift the trough up just enough to take the pressure off the spring and slide it out.
3.) Leave the jack in place as you will need the space you’ve created to install the replacement spring.
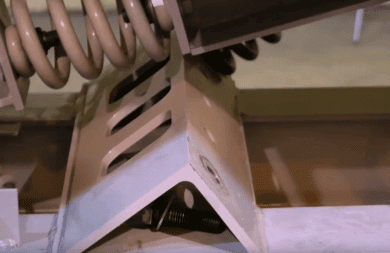
4.) Once the spring assembly is out, inspect the mounting surfaces. Verify that the surfaces of both the spring and hardware mounting surface are flat.
Look for gouging, dishing, or mushrooming of the mounting surfaces.
If the area is gouged out or damaged, then it must be repaired or replaced to ensure a flat mounting surface.
To repair a small area, build it up with a 7018 welding rod and then grind it flat.
5.) Thoroughly clean the mounting surfaces of any dirt, debris, rust, etc..
Verify that the correct spring, same color, and size, is being used to replace the original spring.
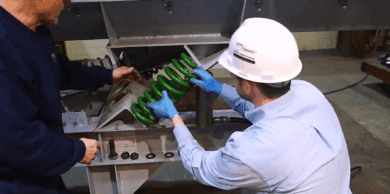
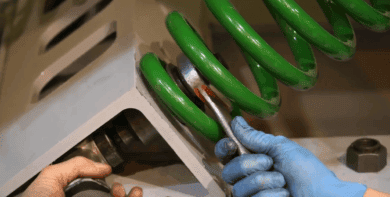
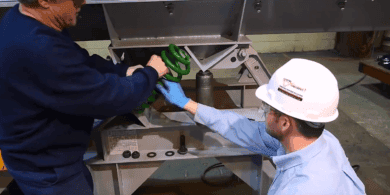
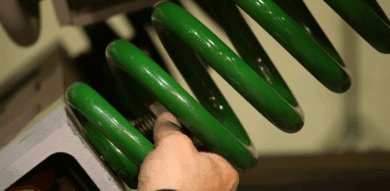
6.) Insert the replacement spring into position.
You may need to lift the trough slightly higher in order to get the new spring into place.
Do not hit the spring with a steel hammer, this will damage the spring. Instead, use a rubber mallet or block of wood if necessary.
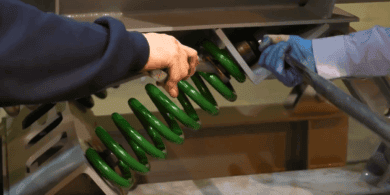
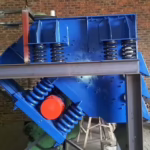
7.) The rotation of the pigtail on the coiled spring should be opposite of the coiled spring adjacent to it. Unless specified otherwise in the GK drawings for your unit.
It is critical that the coils on the new spring should never be in contact with coils of any other spring that may be near it. There should always be a gap between coils.
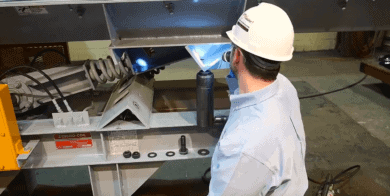
8.) Next, the hardware should be installed as appropriate to the spring being replaced. The hardware arrangement can be found on the -09 or -10 modules of the service manual of the machine being worked on.
It is important that the hardware assembly is properly seated and centered in the eye of the coil spring.
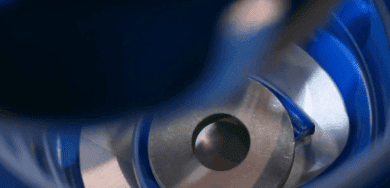
Hardware installation
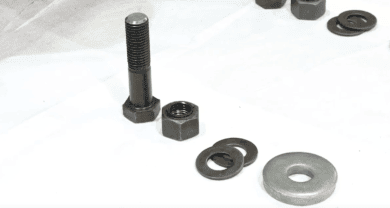
First, place the hard washer on the bolt.
Then, place the bolt through the bracket in the eye of the spring. Next, place the spring washer onto the bolt with the lowered edge facing the spring with another hard washer, followed by the security lock nut.
The hardware can then be torqued to the torque as specified in the torque table in the GK service manual for your machine.
To torque you can use a:
Hand torque wrench
Pneumatic torque wrench
Hydraulic torque wrench
If access does not allow for this method, you can use the “Turn of the Nut Method” as explained in the service manual.
Once the spring is securely installed:
9.) Start the unit.

10.) Check the stroke and verify that the operating strokes on the machine are correct.
In rare instances, more than one spring may need to be replaced at a time.
If you have to replace a rash of springs over a short time period, it’s possible that the springs were overstressed due to the unit being operated over or under stroked condition.
In this rare situation, it is recommended that the entire spring system be replaced one at a time.
If you are changing out all or many pigtail springs at one time please contact us, as there are additional steps that will need to be taken to ensure your safety and the longevity of your equipment.